Introduction#
In a previous article, I demonstrated how to customize messages for Cognito. However, let’s take a moment to consider the practical applications of Cognito in real-world scenarios.
For instance, you can enhance the security of your React applications, ensuring that only authenticated and/or authorized users can access and interact with your application.
In this guide, you’ll discover how to integrate AWS Cognito with Amplify into your React application.
React#
At this point in time, it’s safe to assume that nearly everyone has either used or at least encountered React, so I won’t dive into an explanation of its functionality.
To create a new React application I would recommend using vite.
Here you can check out why CRA should not be used anymore.
After you’ve followed the installation guide, which essentially is only the command below, you should see the following:
npm create vite@latest secure-app -- --template react-ts

Cognito#
AWS Cognito is a service for user authentication and authorization in web and mobile apps. It handles tasks like user sign-up, sign-in, and access control, simplifying the implementation of these features for developers.
The user pool#
First we need to create a user pool. A user pool is like user directory in Cognito. A user pool can handle tasks like user registration, authentication, and password recovery without needing to build and maintain these systems themselves.
import {aws_cognito as cognito, CfnOutput, Stack, StackProps} from 'aws-cdk-lib';
import {Construct} from 'constructs';

export class CognitoStack extends Stack {
    constructor(scope: Construct, id: string, props?: StackProps) {
        super(scope, id, props);

        const userPool = new cognito.UserPool(this, 'user-pool', {
            selfSignUpEnabled: true, // allows users to self register
            signInAliases: {
                email: true, // needs to be set to receive emails
            },
        });

        new CfnOutput(this, 'UserPoolId', {value: userPool.userPoolId});
    }
}
Creating a user pool is the initial step, but to secure our application fully, an additional step is required. This involves setting up what is known as user pool client.
The user pool integration#
A Cognito user pool integration refers to the process of connecting or integrating a Cognito user pool with other
services or components of an application.
This integration allows developers to leverage the user authentication and management capabilities provided by Cognito
within their applications.
By integrating a user pool, developers can enable features like user sign-up, sign-in, and user profile management while
ensuring security and compliance with authentication standards.
import {aws_cognito as cognito, CfnOutput, Stack, StackProps} from 'aws-cdk-lib';
import {Construct} from 'constructs';

export class CognitoStack extends Stack {
    constructor(scope: Construct, id: string, props?: StackProps) {
        super(scope, id, props);

        const userPool = new cognito.UserPool(this, 'user-pool', {
            selfSignUpEnabled: true, // allows users to self register
            signInAliases: {
                email: true, // needs to be set to receive emails
            },
        });

        const userPoolClient = userPool.addClient('user-pool-client');

        new CfnOutput(this, 'UserPoolId', {value: userPool.userPoolId});
        new CfnOutput(this, 'UserPoolClientId', {value: userPoolClient.userPoolClientId});
    }
}
Bring them together#
The next step is to wire react and cognito together, therefor AWS created a frontend library called Amplify UI.
Amplify UI is a collection of accessible, themeable, performant React components that can connect directly to the cloud.
The installation is straight forward, see the documentation.
Step 1 - Install Dependencies
npm install @aws-amplify/ui-react aws-amplify
Step 2 - Replace the content from the vite setup in src/App.tsx
import React from 'react';
import {Amplify} from 'aws-amplify';

import {Authenticator} from '@aws-amplify/ui-react';
import '@aws-amplify/ui-react/styles.css';

Amplify.configure({
    Auth: {
        Cognito: {
            userPoolId: 'UserPoolId from your stack output',
            userPoolClientId: 'UserPoolClientId from your stack output',
        }
    }
});

export default function App() {
    return (
        <Authenticator>
            {({signOut, user}) => (
                <main>
                    <h1>Hello {user.username}</h1>
                    <button onClick={signOut}>Sign out</button>
                </main>
            )}
        </Authenticator>
    );
}
Once you successfully integrated and configured Amplify, you should see following:
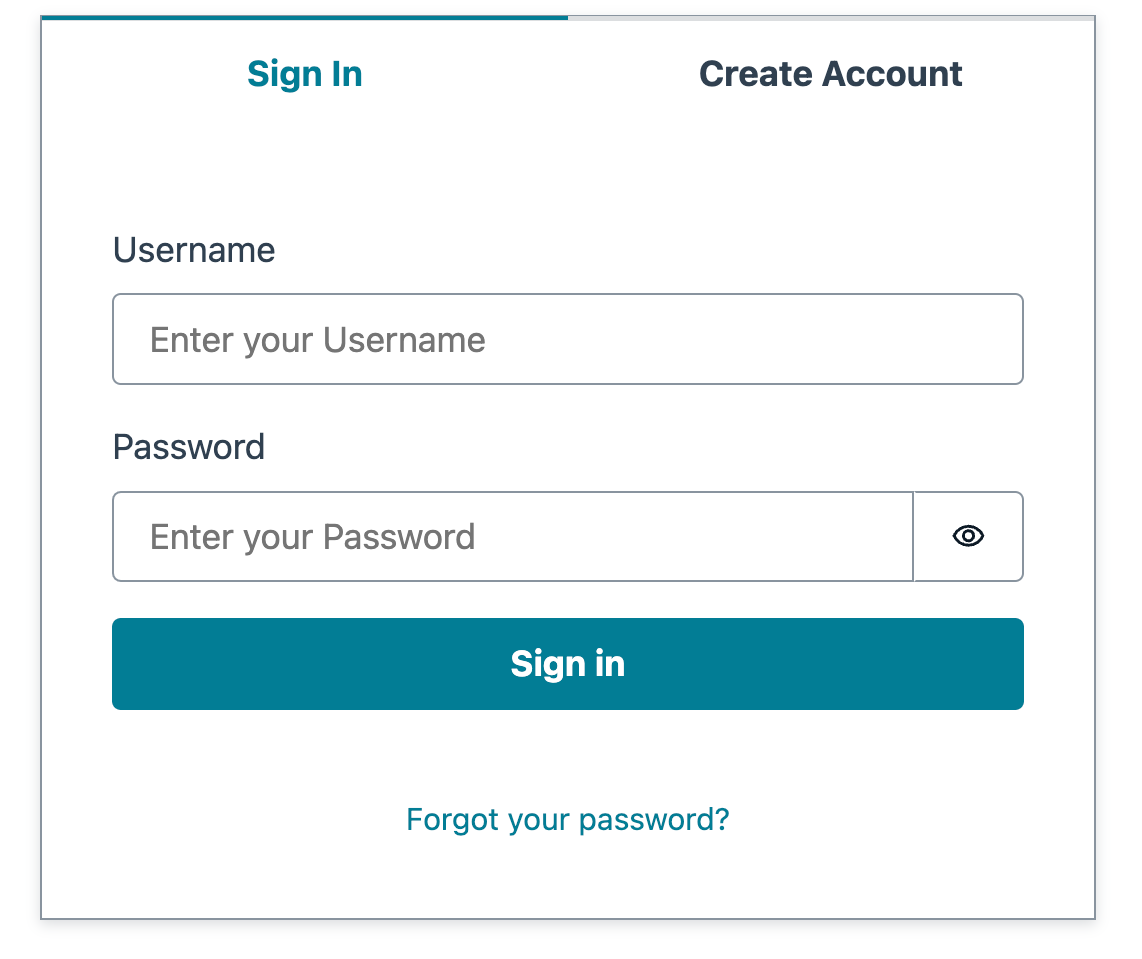
After creating an account and confirming your code in the sign-up screen you will be forwarded to following screen:

Congratulations!!
You secured your first React Application with Cognito & Amplify!
Hope you learned something new, thanks for reading!
Cheers Geri