Introduction#
AWS Cognito is a service that facilitates user authentication and authorization for web and mobile applications.
It allows developers to easily add user sign-up, sign-in, and access control to their applications without having to manage the underlying infrastructure.
Essentially, AWS Cognito enables developers to handle user management tasks securely, efficiently, and at scale, freeing them to focus on building the core features of their applications.
Customizing Cognito messages increases engagement, clarity, and brand consistency.
Why customize messages?#
When you set up AWS Cognito for the first time and register without modifications, you receive this awesome and good looking email.

Sarcasm ☝️
When a user signs up for your app, they should be informed about where they registered. Therefore, you can specify an email subject, include relevant information, and provide a link to the application, for instance.
Basic & Advanced Usage#
I’ll divide this into two sections: one covering basic usage and the other focusing on advanced customization.
Basic customization#
When creating a UserPool with CDK, there are two message you can customize:
- UserInvitationConfig, this is used when an Admin creates an account for you.
- UserVerificationConfig, this is used when you sign up yourself. Which you already saw above.
Check out this CDK example for a user-pool featuring a custom user verification message
const userPool = new cognito.UserPool(this, 'user-pool', {
    selfSignUpEnabled: true,
    userVerification: {
        emailStyle: cognito.VerificationEmailStyle.CODE,
        emailSubject: 'Verify your email for our awesome superluminar app!',
        emailBody: `<h3>Hi 👋</h3>
        Thanks for signing up to our awesome superluminar app! <br/>
        Your verification code is <code>{####}</code>`,
    },
});
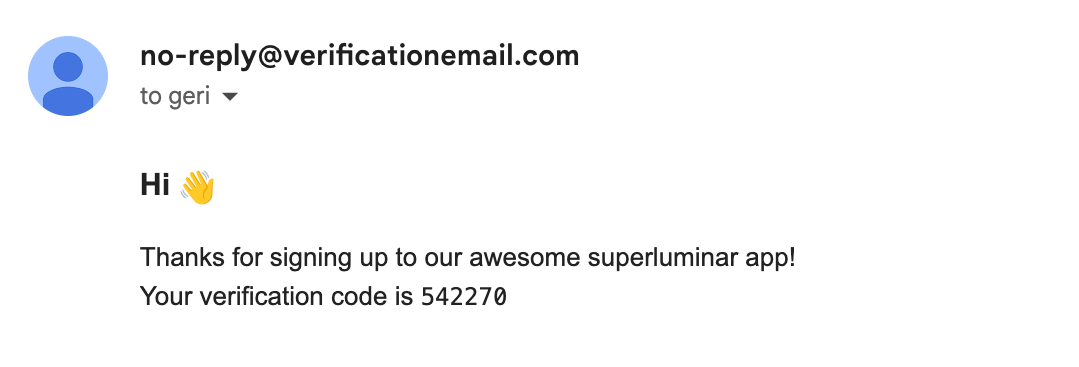
Result:

The mail already looks way better! You can now improve it and add some extra styling if you want.
This basic customization works really great if you do not have any hard requirements, as soon as you get requirements like internationalization or personalisation, you need to do advanced customization through the custom message Lambda trigger.
Advanced customization#
On the advanced customization, you need to implement a lambda to customize your message.
Let’s consider our need for personalization. In order to fulfill this requirement, it’s advisable to craft messages that begin with a greeting that includes the user’s name.
Step 1 - Create the user pool, including a custom message lambda:
const customMessageLambda = new NodejsFunction(this, 'custom-message', {
    entry: 'functions/customMessage.ts',
    handler: 'handler',
});

const userPool = new cognito.UserPool(this, 'advanced-user-pool', {
    selfSignUpEnabled: true,
    standardAttributes: {
        givenName: { required: true },
        familyName: { required: true },
    },
    lambdaTriggers: {
        customMessage: customMessageLambda
    }
});
Step 2 - Create the custom lambda:
import {CustomMessageTriggerHandler} from 'aws-lambda';

export const handler: CustomMessageTriggerHandler = async (event) => {
    if (event.triggerSource === 'CustomMessage_SignUp') {
        const userAttributes = event.request.userAttributes;
        const userDisplayName = `${userAttributes.given_name} ${userAttributes.family_name}`;

        event.response.emailSubject = 'Verify your email for our awesome superluminar app!';
        event.response.emailMessage = `<h3>Hi ${userDisplayName} 👋</h3>
            Thanks for signing up to our awesome superluminar app!<br/>
            Your verification code is <code>${event.request.codeParameter}</code>`;
    }

    return event;
};
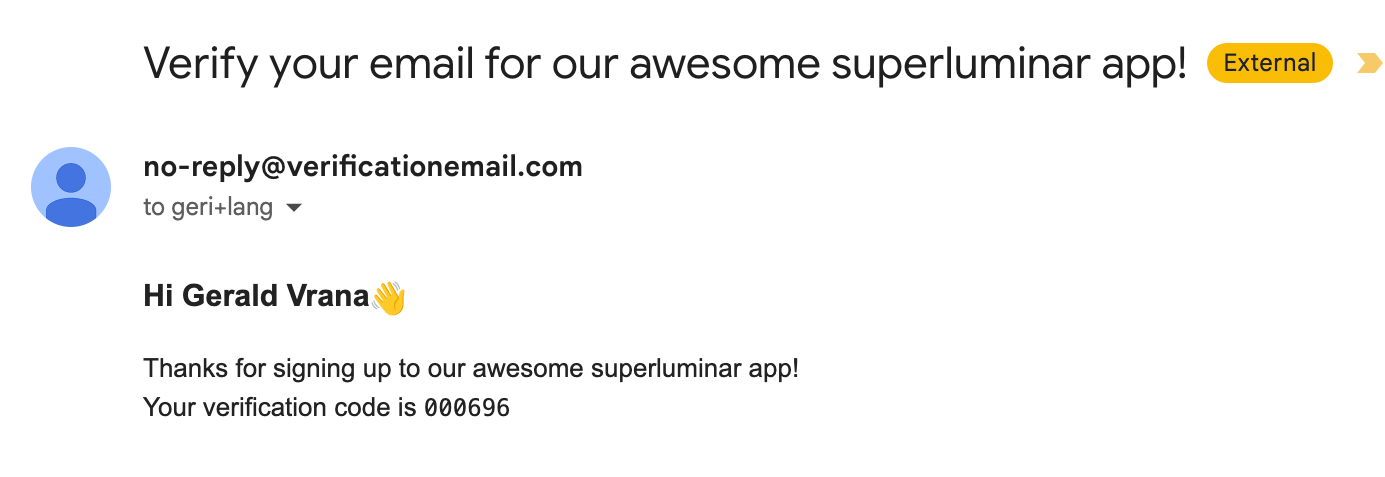
This will lead to following result:

You should now have the capability to personalize your Cognito messages.
To discover how to incorporate translations, refer to my next article on Cognito message localization.
Thank you for reading! Best regards, Geri
